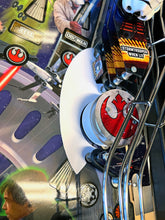
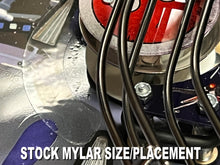
This replaces the too small, too thin, ineffective mylar by the Right bumper on Star Wars:Fall of the Empire (see second picture). It covers the area in front of the pop bumper and the area in front of the target for much better protection than stock.
Includes custom cut mylar and single use alcohol wipe for installation.
Factory mylar pulls up very easily, but does leave residue. Requires removal of the factory mylar and cleaning with a product like goo-gone to clean the playfield surface before installing. Hardware stores often sell a 2oz bottle of goo gone for $3 or so.
INSTALLATION TIPS:
- Grab a credit card or other plastic card like a store loyalty card. You'll need the hard edge to smooth the mylar.
- Use the included alcohol wipe to make sure the area where the mylar will go. Let it dry.
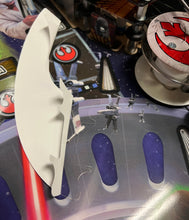
- Bend back about 1/2" of the backing paper on the leading edge (the end furthest from the flippers) and crease it hard so it sets as flat as possible against the back side. See picture on this page showing folded mylar.
- The exposed sticky part of the mylar should hover slightly above the playfield from the fold thickness, allowing you to test alignment first. (Note that you may have to push back on the targets to allow the narrow edge of the mylar under them)
- Line up the mylar so it looks like the white paper-backing images on this page that show the fit. Once you get it lined up, press the sticky part to the playfield and smooth it with your finger.
- Double check that the rest of the still papered mylar is lining up. If it ISN'T, pull up the sticky stub and do step 5 again. If it IS still lined up, continue to step 7.
- Lift the mylar and grab the 1/2" you folded back underneath and slowly pull it from the back as you smooth it with a hard edge like a credit card, etc to make sure no bubbles get under the mylar. Pull and smooth slowly for a good install.
- Smooth the mylar more with the credit card edge if necessary until it seems to disappear into the playfield.
- That's it! You're done!


