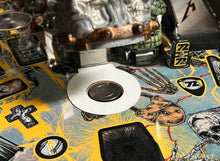
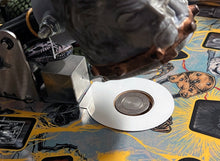
This mylar protects the playfield area around the hammer magnet to make clear and artwork chipping from repeated ball impacts less likely. It protects the area from around the cutout for the magnet up to the aluminum captive ball block. It looks kind of like an ADA compliant toilet seat before you install it, but once the backing is removed and the mylar is installed it becomes transparent and the suggestive shape can remain our little secret.
A single-use disposable rubbing alcohol wipe is included to clean the playfield before you install the mylar.
The third photo shows the suggested install progression where you fold back only part of the backing while you orient the mylar so it lines up with the cutout and the top lines up with the aluminum block. Once the placement is verified you can remove the rest of the backing and smooth the mylar to remove any bubbles.
NOTE: If your playfield has already chipped or flaked in the area you intend to install the mylar, you MUST clean and then seal the chip/flake area with Sally Hansen's Hard as Nails clear nail polish #800 (UPC 0 74170 38283 9) to arrest the chipping. If you just put the mylar over the damage without taking this step, the chipping can continue under the mylar.


