NOTE: THIS DOES NOT WORK ON SPIKE3. The shooter lane on SPIKE3 is slightly narrower than Spike 2.
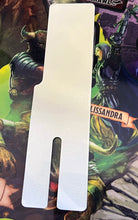
This custom-cut mylar fits the shooter lane on Stern Spike machines to help protect them from damage from the ball being slammed into the shooter lane. Turning down the trough eject power to 176 and installing this mylar will dramatically reduce the chances for early shooter lane damage or wear (you remove paper backing at installation - the mylar is clear).
Mylar includes single use alcohol wipe to clean the install area before installing it.
INSTALL INSTRUCTIONS:
- POWER OFF THE MACHINE
- NOTE: If your playfield has already chipped or flaked in the shooter lane, you MUST clean and then seal the chip/flake area with Sally Hansen's Hard as Nails clear nail polish #800 (UPC 0 74170 38283 9) to arrest the chipping. If you just put the mylar over the damage without taking this step, the chipping can continue under the mylar.
- Clean shooter lane area with included alcohol wipe
- Fold half the paper backing away from the mylar vertically (from top to bottom), so the left side of the mylar protector is exposed and the left side has the paper doubled from the still-adhered paper and the paper you've folded from the right side.
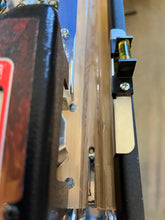
- At an angle, line up the mylar with the right edge of the shooter lane, making sure the bottom end of the mylar (where the switch slot ends) is lined up with the end of the playfield.
- While maintaining the angle press down on the mylar so it bends at the right end, and starts making contact with the playfield. When you get enough stuck so the mylar won't move, start smoothing it top to bottom repeatedly with your finger to smooth it to the playfield.
- Continue pressing the mylar to the playfield with long strokes top to bottom. As you hit the recessed area with the switch, make sure you don't create bumps or air bubbles. The switch cutout in the mylar will move over a little to line up as you adhere mylar to the side of the recessed area.
- Once you have half the mylar adhered without bubbles or folds, pull on the folded paper backing so it lifts the paper backing from the mylar on the remaining covered left side as you continue the long strokes smoothing the mylar to the shooter lane.
- Use the back of a fingernail to continue pressing the mylar into the shooter lane, helping it become more transparent
- Make sure you have reduced the Trough Eject power to 176 on the system adjustments menu. The default power is usually 240, which has the potential for much greater damage to the shooter lane. 176 will get the job done much more gently.


